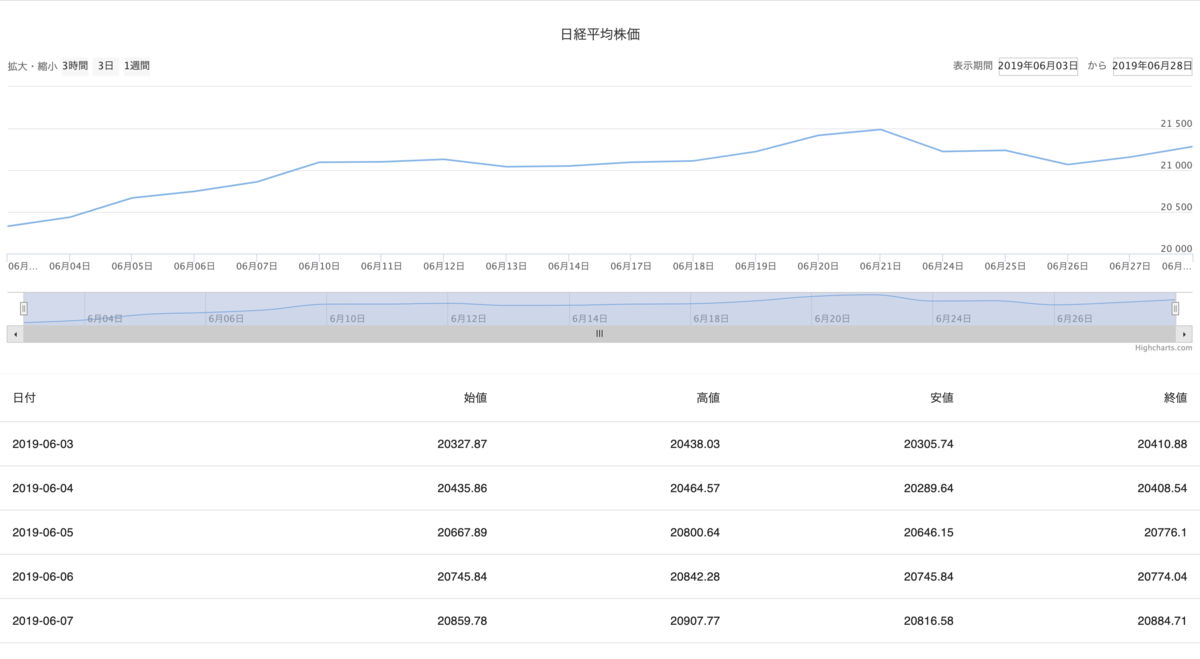
株価アプリをコンテナ化して行きます。次のアプリのDockerfileを作りdocker-composeでコンテナ間通信させます。
www.case-k.jp
コンテナに入り必要なモジュールを追加します。ExpressとReactアプリのDockerfileを作ります。
Dockerfile
アプリに必要なExpressとReactのDockerfileを作ります。
Express
まずはExpressのDockerfileを作るために必要なモジュールをコンテナ内で追加し動作確認します。動作確認ができたらDockerfileを作ります。
モジュールのインストールと動作確認
Nodeのイメージを取得する。
$ docker search --limit 5 node
$ docker image pull node
$ docker container run -it -p 8889:3001 node bash
コンテナ内でアプリで必要なモジュールをインストールします。
$ yarn global add express-generator
$ yarn add http-errors
$ yarn add cookie-parser
$ yarn add express
$ yarn add morgan
$ docker start 125d7136a0c4
動作確認用でホストのアプリをコンテナにコピーします。
$ docker cp ./react-backend 0365d2c8a0bd:/
$ cd /react-backend
$ yarn run start
ホストからcurlコマンドで確認。
$ curl localhost:8889
<!DOCTYPE html><html><head><title>Express</title><link rel="stylesheet" href="/stylesheets/style.css"></head><body><h1>Express</h1><p>Welcome to Express</p></body></html>(anaconda3-4.3.1) keisukenoMacBook-Pro-2:react-eventslist
動作確認できたのでExpress用のDockerfileを作ります。
Dockerfile作成
# Dockerfile-express
FROM node:latest

RUN yarn global add express-generator \
    yarn add http-errors \
    yarn add cookie-parser \
    yarn add express \
    yarn add morgan

COPY ./react-backend /app/react-backend
WORKDIR /app/react-backend

EXPOSE 3001

CMD yarn run start
イメージをビルドする。
$ docker image build -f Dockerfile-express -t express-app .
$ docker container run -d -p 8889:3001 express-app
React
次にReactのDockerfileを作るために必要なモジュールをコンテナ内で追加し動作確認します。動作確認ができたらDockerfileを作ります。
モジュールのインストールと動作確認
$ docker container run -d -p 9999:3000 react-app
$ yarn add redux
$ yarn add axios
$ yarn add redux-thunk
$ yarn add loader
$ yarn add highcharts
$ yarn add highcharts-react-official
$ yarn add @material-ui/core
$ yarn add @google-cloud/bigquery
アプリをコンテナにコピーします。
$ docker cp ./react-backend 0365d2c8a0bd:/
$ cd /react-backend/client
$ yarn run start
動作確認します。
$ curl http://localhost:9999
<!DOCTYPE html>
<html lang="en">
  <head>
    <meta charset="utf-8" />
    <link rel="icon" href="/favicon.ico" />
    <meta name="viewport" content="width=device-width, initial-scale=1" />
    <meta name="theme-color" content="#000000" />
    <meta
      name="description"
      content="Web site created using create-react-app"
    />
    <link rel="apple-touch-icon" href="/logo192.png" />
    <!--
      manifest.json provides metadata used when your web app is installed on a
      user's mobile device or desktop. See https://developers.google.com/web/fundamentals/web-app-manifest/
    -->
    <link rel="manifest" href="/manifest.json" />
    <!--
      Notice the use of  in the tags above.
      It will be replaced with the URL of the `public` folder during the build.
      Only files inside the `public` folder can be referenced from the HTML.

      Unlike "/favicon.ico" or "favicon.ico", "/favicon.ico" will
      work correctly both with client-side routing and a non-root public URL.
      Learn how to configure a non-root public URL by running `npm run build`.
    -->
    <title>React App</title>
  </head>
  <body>
    <noscript>You need to enable JavaScript to run this app.</noscript>
    <div id="root"></div>
    <!--
      This HTML file is a template.
      If you open it directly in the browser, you will see an empty page.

      You can add webfonts, meta tags, or analytics to this file.
      The build step will place the bundled scripts into the <body> tag.

      To begin the development, run `npm start` or `yarn start`.
      To create a production bundle, use `npm run build` or `yarn build`.
    -->
  <script src="/static/js/bundle.js"></script><script src="/static/js/0.chunk.js"></script><script src="/static/js/main.chunk.js"></script></body>
</html>
Dockerfile作成
# Dockerfile-react
FROM node:latest

RUN yarn add redux \
    yarn add react-redux \
    yarn add axios \
    yarn add redux-thunk \
    yarn add loader \
    yarn add highcharts \
    yarn add highcharts-react-official \
    yarn add @material-ui/core \
    yarn add @google-cloud/bigquery

COPY ./react-backend /app/react-backend
WORKDIR /app/react-backend/client

EXPOSE 3000

CMD yarn run start
イメージをビルド
$ docker image build -f Dockerfile-react -t react-app .
$ docker container run -d -p 9999:3000 react-app
Docker Compose
動作確認ができたのでReactとExpress間通信できるようdocker-composeを行います。次のようなマニフェストファイルを作ります。
マニフェスト作成
# docker-compose.yml
version: '3'
services:
  express:
    build:
      context: .
      dockerfile: Dockerfile-express
    image: express-app
    container_name: express-app
    ports:
      - 9999:3001
  react:
    build:
      context: .
      dockerfile: Dockerfile-react
    image: react-app
    container_name: react-app
    ports:
      - 8889:3000
Reactアプリのプロキシ先を次のようにします。
  # "proxy": "http://express:3001",
   "proxy": "http://express:3001",
  "eslintConfig": {
    "extends": "react-app"
  },
ビルドと動作確認
マニフェストができたのでビルドしコンテナ間で通信できているか動作確認します。
$ docker-compose up --build
$ docker ps -a
CONTAINER ID        IMAGE               COMMAND                  CREATED             STATUS              PORTS                    NAMES
21de575391fb        express-app         "docker-entrypoint.s…"   33 seconds ago      Up 32 seconds       0.0.0.0:9999->3001/tcp   express-app
5418ce31746d        react-app           "docker-entrypoint.s…"   33 seconds ago      Up 32 seconds       0.0.0.0:8889->3000/tcp   react-app
ブラウザで0.0.0.0:8889を開き動作確認します。

ReactからExpressdで作ったを介してデータを取得できることが確認できました。次はNginxのプロキシを介すよう変更を加えローカルの開発環境を作ります。
参考
qiita.com